Install Payment Plans
Install the app, pick a plan and work through the four-step setup guide so payment plans can appear on your store.
All docs
Payment Plans adds a "pay over time" option to your product pages. The customer pays a down payment at checkout, and the app charges the rest in installments to the card saved on the order, through Shopify's own payment mandates. No third-party lender is involved.
Before you start
- Payment Plans is built for Shopify Plus stores. Development and partner stores can also install it for testing.
- Customers pay with a card Shopify can save against the order, so they can be charged later without being present.
Install and choose a plan
- Install Payment Plans from the Shopify App Store and open it from your Shopify admin.
- Pick a plan on the Pricing page. Until a plan is active, every page in the app sends you back to Pricing.
- Commission only: no monthly fee, plus a 5% commission on items paid for with a payment plan.
- Scale: $200 a month and no commission.
- New stores get a 7-day free trial.
You can change plan later from Settings > Your subscription plan > Manage subscription.
Work through the setup guide
The app's home page shows a setup guide with four steps. Each step has a button that takes you to the right place. Tick a step off once you've done it; the guide doesn't detect completion by itself.
- Add the payment plans widget to your theme. See Add the widget to your product page below.
- Add payment plans to your customer accounts page. See Add the block to the order status page below.
- Review your refund and shipping settings. Decide your refund policy and when orders are released for fulfillment.
- Create your first payment plan. See Create a payment plan.
Add the widget to your product page
Without the widget, customers never see a payment plan option.
- Click Add payment plans widget in the setup guide, or go to Online Store > Themes > Customize and open your product template.
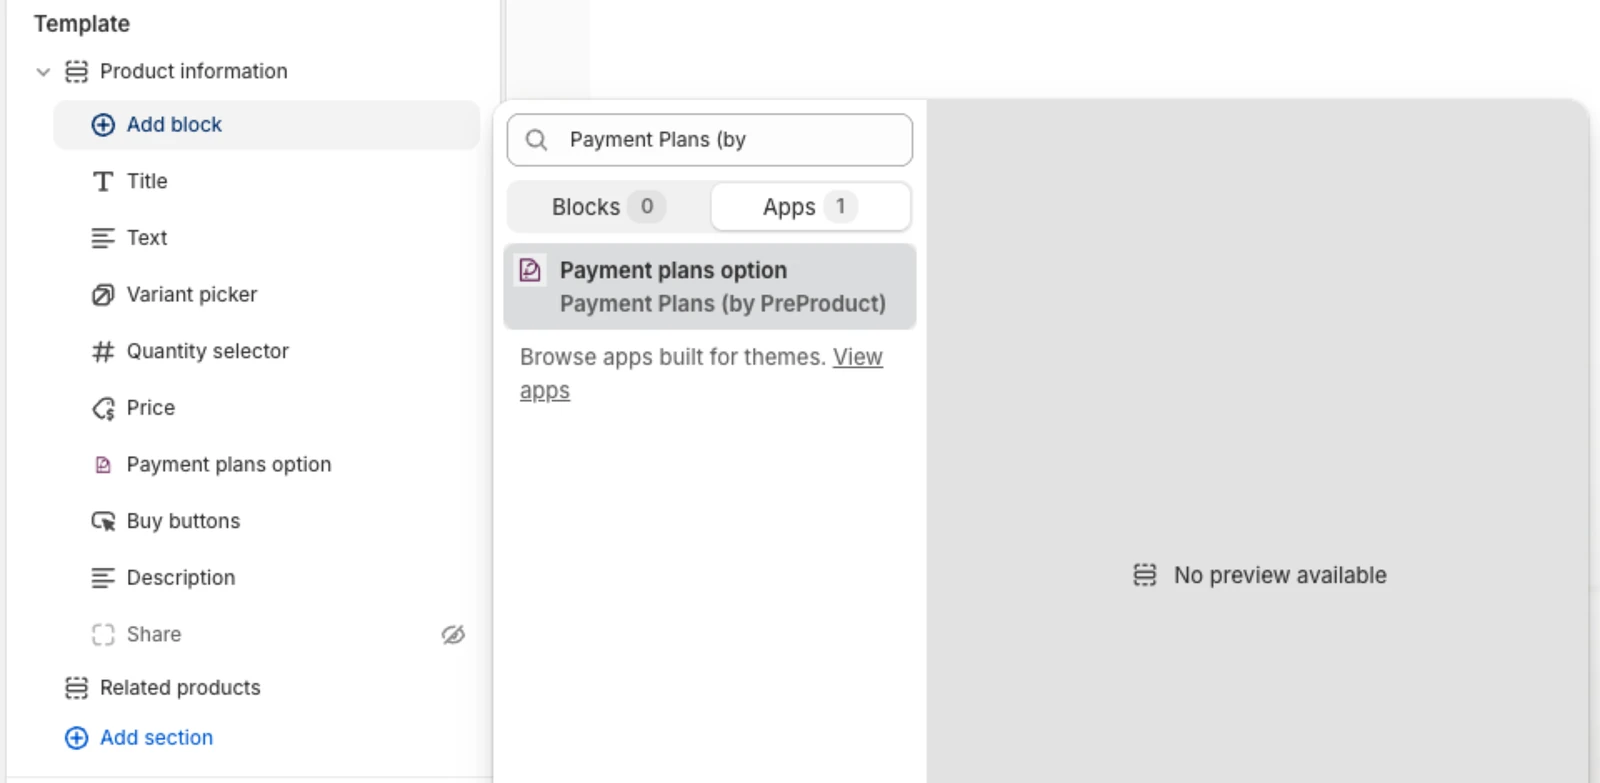
- In the Product information section, click Add block, open the Apps tab and choose Payment plans option from Payment Plans (by PreProduct).
- Drag the block to where you want it, usually just above the add to cart button.
- Click Save.
On a product that isn't on a payment plan yet, the editor shows a placeholder, "When listed, payment plans will appear here". Customers see nothing there until the product has a plan.
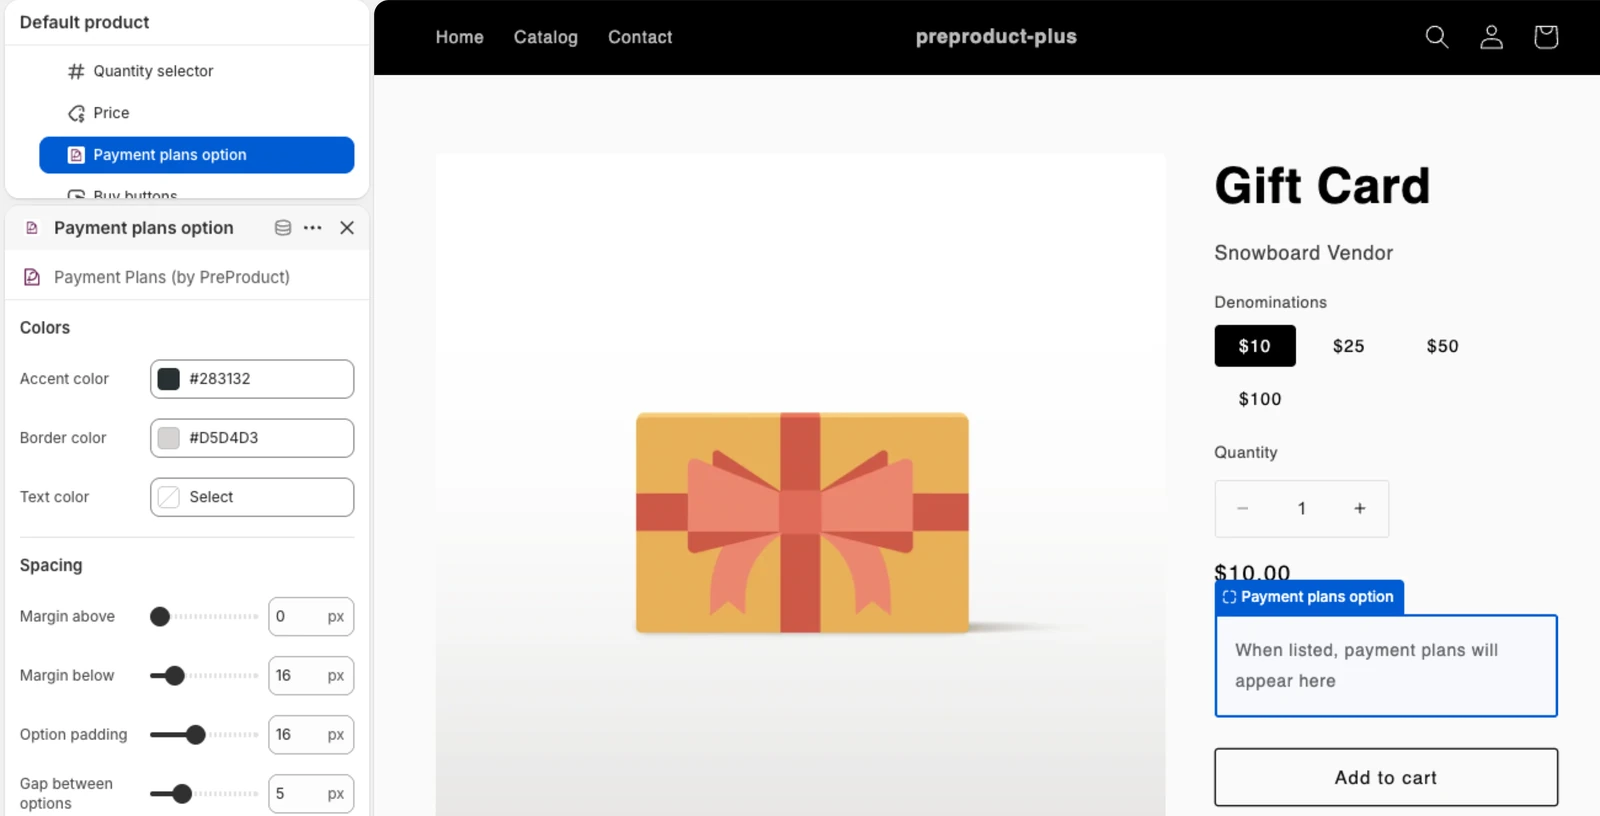
The block's settings change its wording, colours and spacing. See What customers see.
Add the block to the order status page
This block shows customers their plan on the order status page, and lets them cancel it.
- Click Enable customer accounts in the setup guide, or go to Settings > Checkout, click Customize and switch to the Order status page.
- Click Add block and choose customer payment plans from Payment Plans (by PreProduct). Typing "PreProduct" in the search finds it quickly.
- Place it under Payment details, then click Save.
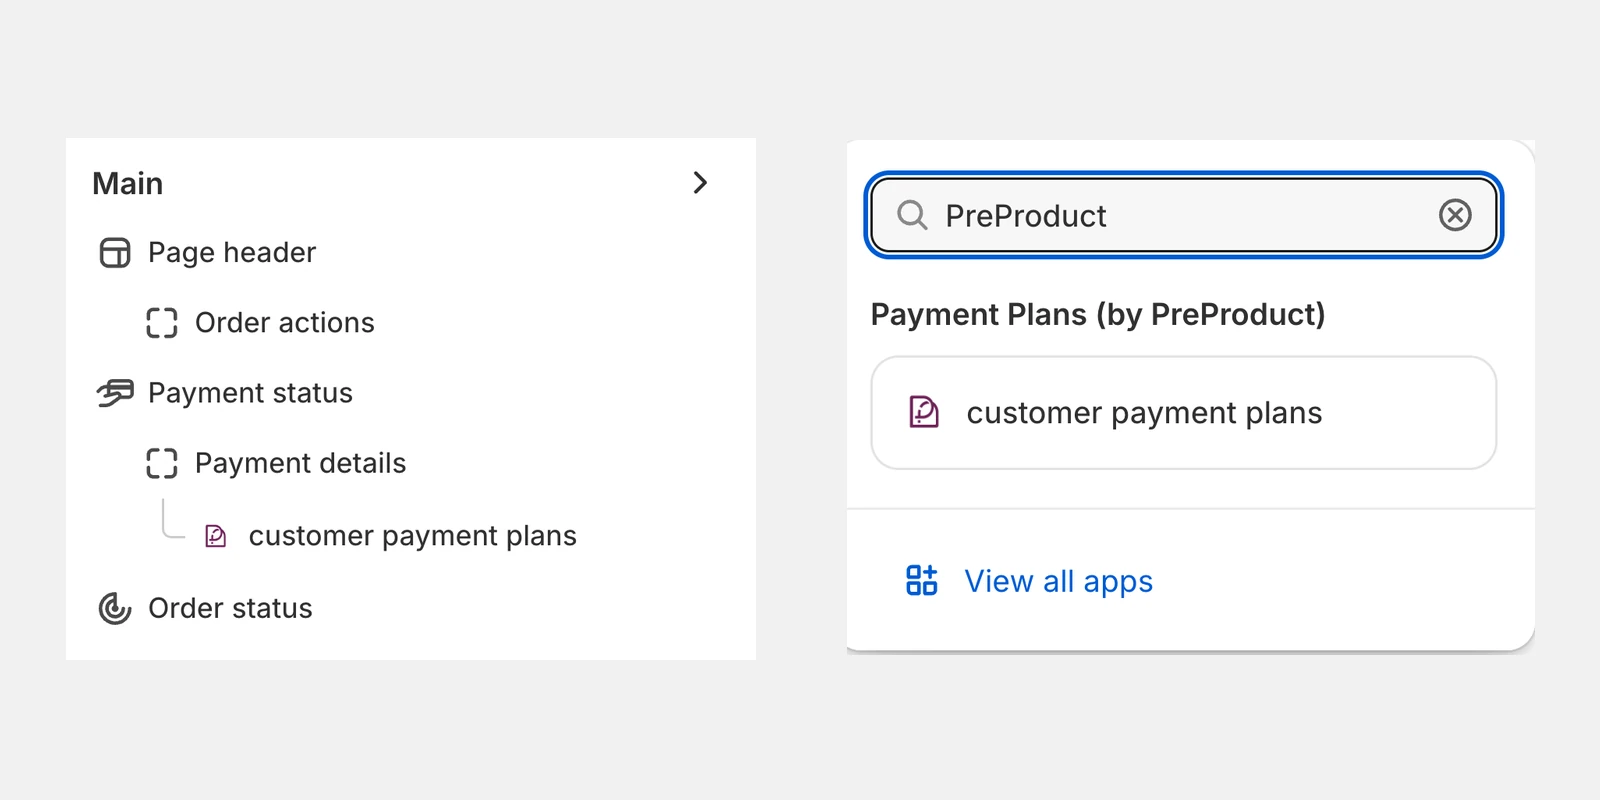
The block uses Shopify's new customer accounts.
What happens if you uninstall
Uninstalling removes your shop's data from the app, including its payment plans. No further installments are charged after that, so finish or settle open plans first.